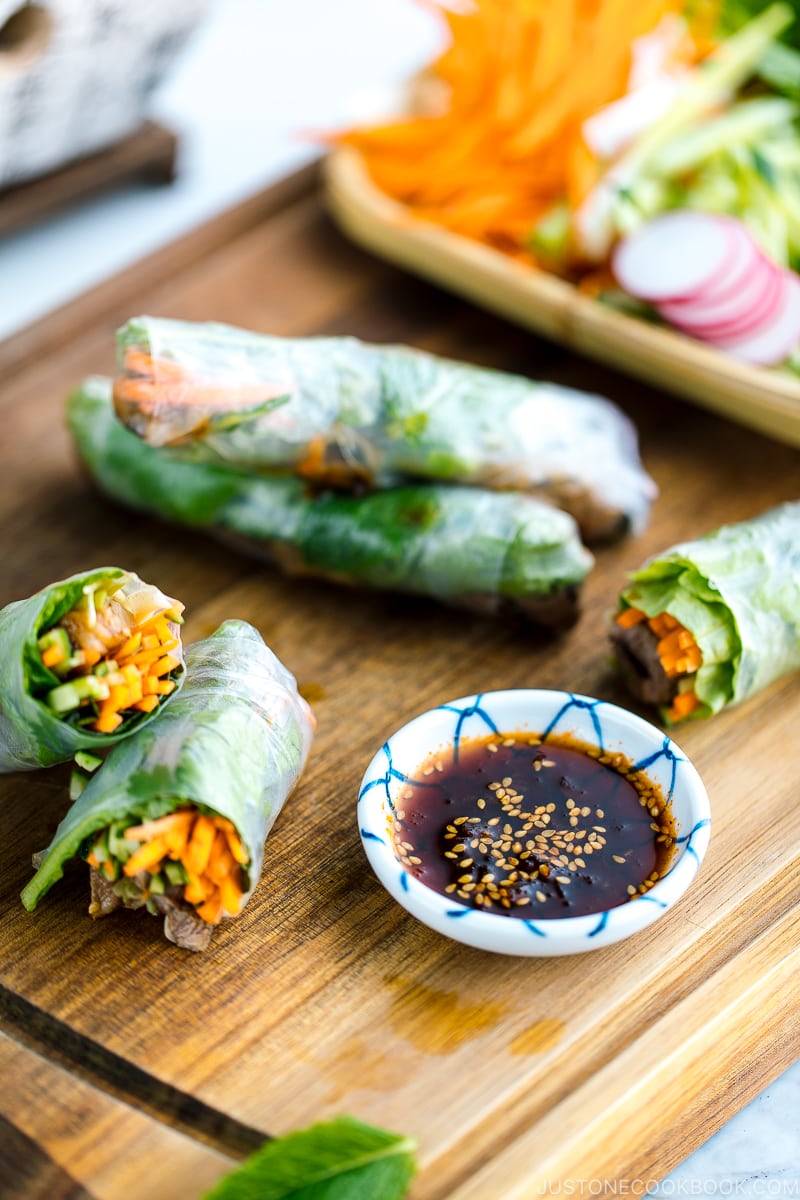
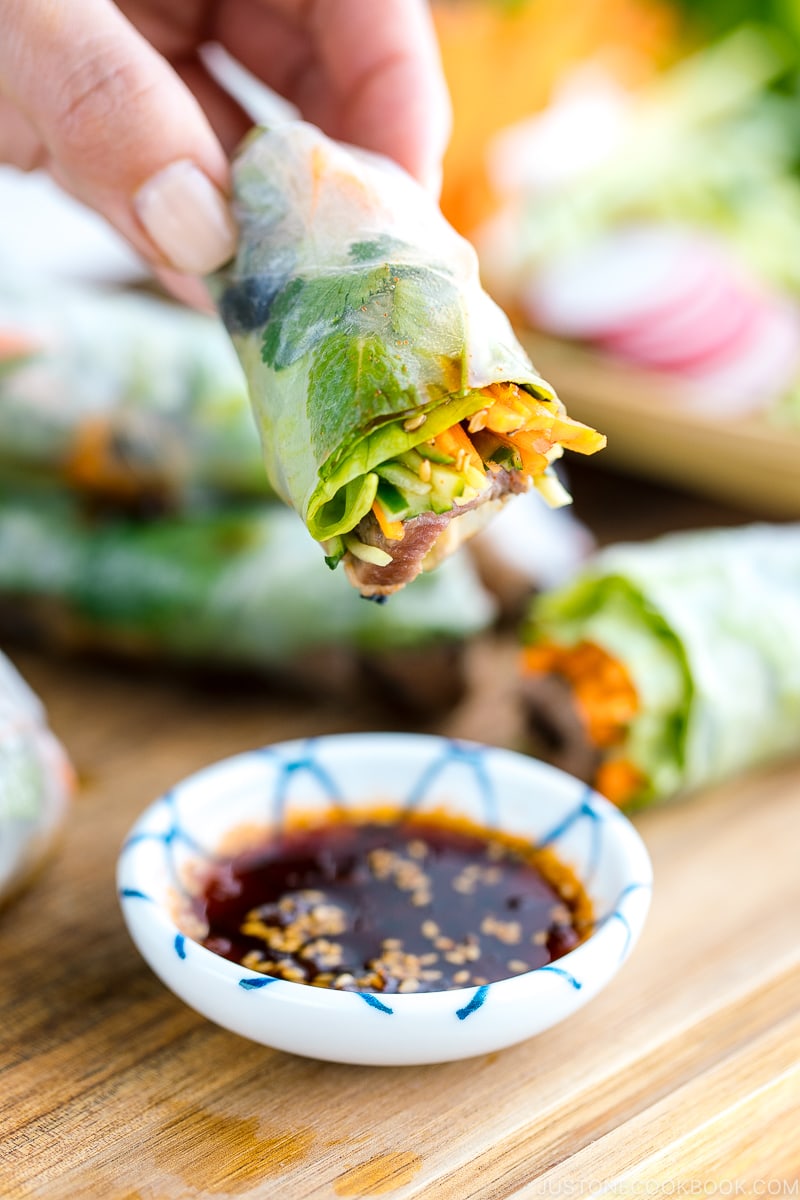
These Fresh Spring Rolls with Yakiniku are bursting with savory and refreshing ingredients. It’s fun to wrap Japanese BBQ beef and crunchy vegetables in rice paper and seal in the deliciousness. Serve it with homemade yakiniku sauce for dipping.

What do you like to prepare on a hot summer day when you want to avoid standing in the kitchen for a long time?
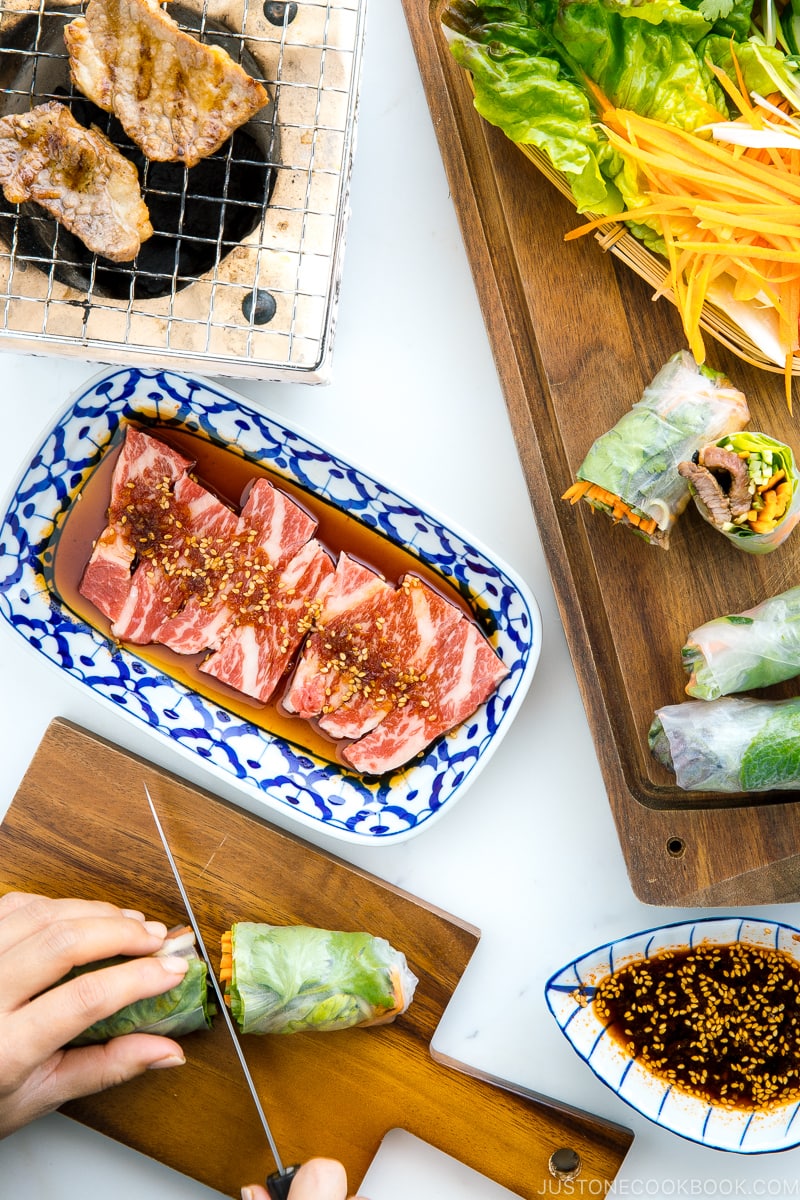
When I want to stay away from the stove, these Fresh Spring Rolls with Yakiniku (焼肉の生春巻き) are one of my favorite foods to make. I usually assign the hardest part of the work to our family head grill chef (thank you Mr. JOC!), and you too can do the same. Sounds good so far, right? All you need to do is wash the vegetables and cut them into julienned strips. Once the meat is done grilling, you just need to wrap up everything into light, colorful rolls.
Oh, did I mention you should dip these spring rolls in a homemade Japanese BBQ sauce too? Incredibly refreshing and packed with flavors, everyone who tries these will be in love!
Watch How to Make Fresh Spring Rolls with Yakiniku
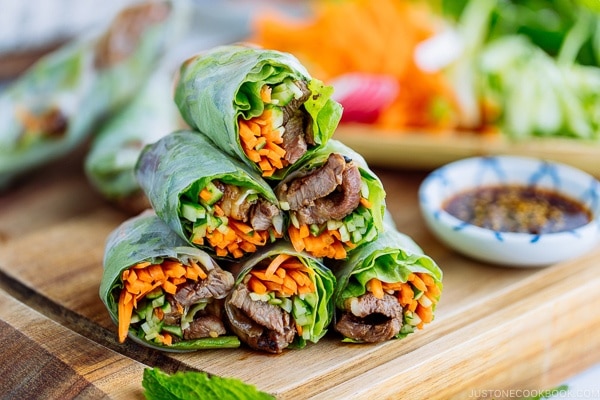
Juicy Japanese BBQ meat with crunchy vegetables, wrapped in rice paper to seal in the deliciousness, these fresh spring rolls with Yakiniku make the best summer dish!
Gluten-Free Japanese BBQ Sauce
Yakiniku sauce (or Japanese BBQ Sauce) is sweet, savory & intensely flavorful, which makes it the best companion to grilled meats, thinly sliced short ribs, and many other grilled foods. Although there are several brands of Japanese BBQ sauce available in the Japanese grocery stores, they often come with a few sneaky ingredients on the labels that you may not want to eat.
Luckily, homemade Yakiniku Sauce is easy enough to make with the condiments you have in the kitchen. Make a large batch in advance and you’d be happy to use the leftover for the rest of the week.
To make it gluten-free, all you need is to swap the regular soy sauce with Gluten-Free Soy Sauces.
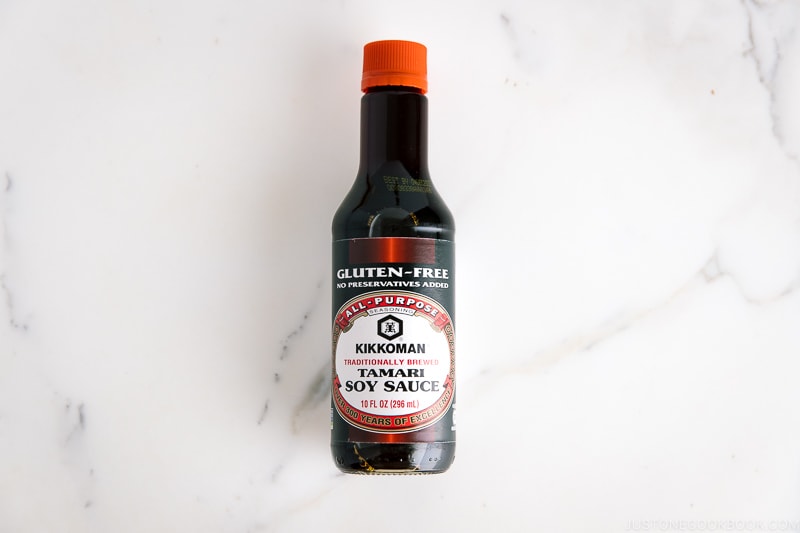
To make Fresh Spring Rolls with Yakiniku, I used Kikkoman’s Gluten-Free Tamari Soy Sauce. If you do not have to make this recipe gluten-free, feel free to use regular soy sauce. The flavor is pretty much the same, so there is no need to adjust the amount.
3 Tips to Make Fresh Spring Rolls with Yakiniku
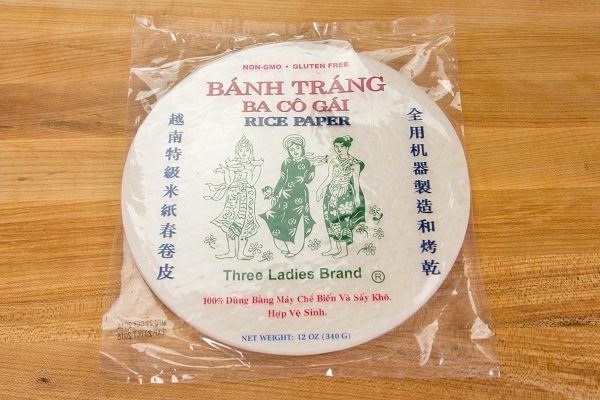
1. Buy “Three Ladies Brand” rice paper
Some of you have asked for my recommendation for a rice paper brand. I’ve tried a few and my favorite choice goes to “Three Ladies Brand”. The rice papers are easy to work with, and I find it easy to detach the spring rolls without tearing the rice papers when they stick to each other.
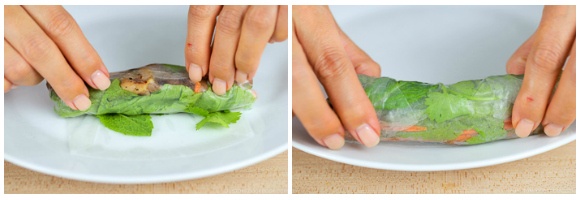
2. Start with less filling and “tuck tightly and roll”
If you’ve never worked with rice papers for spring rolls before, it’s a bit like making pancakes: you just need a few practice runs to get better at it. To start off, do not over pile the filling. It’s easier to work with less than more. Once you do a few rolls, you will get better at judging the right amount of filling. When you’re ready to roll the wrappers, make sure your first fold over is tight enough to cover the ingredients. Then fold the side edges towards the middle to secure a nice package. Then give it another tight roll to finish off.
3. Adjust the amount of sugar
For those who are careful with their sugar intake, the amount of sugar (3 Tbsp sugar) that goes into the sauce might raise your eyebrow. Please feel free to adjust the amount, but remember that you need to counter the salty flavor from soy sauce with a sweetener. You can swap the sugar with honey or maple syrup if you like, but the final taste will be different from my recipe.
If you prefer the original taste of Japanese Yakiniku Sauce, follow this recipe, but don’t go crazy with the sauce. The sauce is there to enhance the flavor of fresh ingredients you’re eating.
Various Filling Choices
For this recipe, I included lettuce, cucumber, and carrot – simple enough ingredients to assemble for a weeknight dinner. Below are some suggestions for the filling, but feel free to customize and work with whatever you fancy:
Protein Choices
- Thinly sliced beef (short ribs, ribeye, and chuck)
- Thinly sliced pork (pork belly and pork loin)
- Strips of chicken breast and thighs
- Shrimp/prawn
- Strips of firm tofu
- Boiled eggs, sliced or wedges
Vegetable Choices
- Any kind of leafy lettuce
- Carrot
- Cucumber
- Green onion
- Garlic chives
- Radishes such as daikon or red radish
- Jicama
- Avocado
- Mango
- Sugar snap peas
- Red bell peppers
- Bean sprouts
- Herbs (mint, basil, cilantro)
- Grilled eggplants
- Grilled zucchini
Make These Fresh Spring Rolls Vegetarian and Vegan
This recipe can make a wholesome meatless meal, perfect for those who are vegetarian and vegan. Swap the meat with grilled tofu and vegetables such as zucchini, eggplants, and bell peppers. You can also grill up an assortment of mushrooms in replace of the meat. They will work very well with homemade Yakiniku Sauce.
Bright and flavorful, I promise these fresh spring rolls will be a regular occurrence in your summer meal.
Japanese Ingredient Substitution: If you want to look for substitutes for Japanese condiments and ingredients, click here.
Sign up for the free Just One Cookbook newsletter delivered to your inbox! And stay in touch with me on Facebook, Pinterest, YouTube, and Instagram for all the latest updates.

Fresh Spring Rolls with Yakiniku
Video
Ingredients
- 4 leaves red leaf lettuce
- 1 bunch mint
- 1 bunch cilantro (coriander)
- ¾ lb thinly sliced short rib
- 1 carrot
- 1 Japanese or Persian cucumber
- 1 green onion/scallion
- 1 Tbsp neutral oil
- 8 rice papers
Yakiniku Sauce (Tare)
- ½ cup gluten-free soy sauce (I used Kikkoman Gluten-Free Tamari Soy Sauce)
- 3 Tbsp sugar
- 2 Tbsp mirin
- 2 Tbsp sake
- 1 Tbsp sesame seeds
- ½ tsp gochugaru (Korean pepper flakes) (or use ichimi togarashi)
- ½ tsp toasted sesame oil
- freshly ground black pepper
- ½ clove garlic
- ½ knob ginger
- ¼ apple (I used Fuji apple)
Instructions
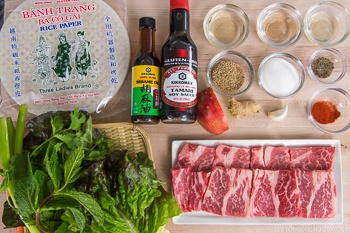
- Rinse the lettuce, mint, and cilantro and dry completely. Gather all the ingredients on the working surface.
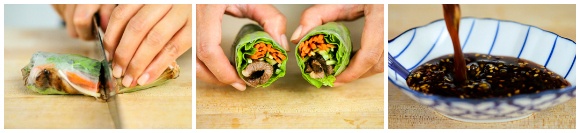
- Add all the ingredients for the sauce: ½ cup soy sauce, 3 Tbsp granulated sugar, 2 Tbsp mirin, 2 Tbsp sake, 1 Tbsp sesame seeds, ½ tsp gochugaru (or ichimi togarashi), ½ tsp sesame oil, and freshly ground black pepper.

- Grate ¼ apple, ½ clove garlic, and ½ knob ginger.
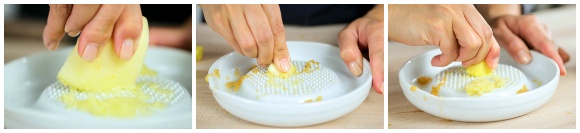
- Add the grated apple, garlic, and ginger into the sauce and mix all together.

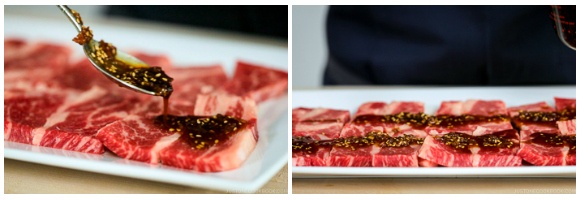
- Place the meat in a single layer and drizzle some of the sauce on top. The sauce does not have to cover the entire meat. In Japanese BBQ restaurants, they usually just drizzle a small amount to the meat.
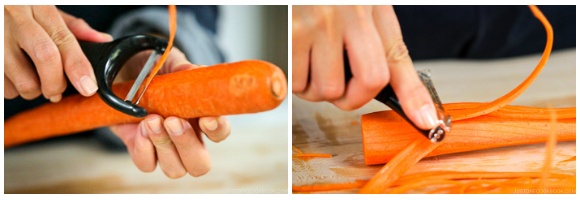
- Peel the carrot. Use a julienne peeler or a knife to cut the carrot into julienned strips.
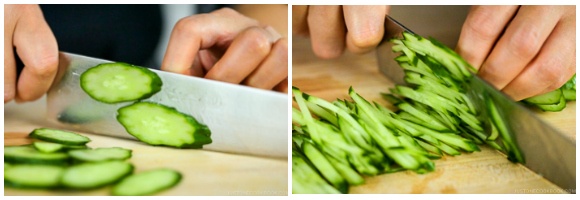
- Cut the cucumber diagonally into thin slices and then cut them into thin strips.
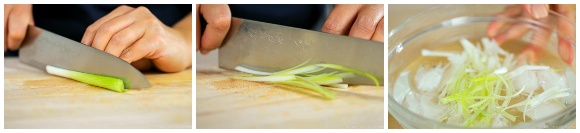
- Cut off the green part of the green onions and we will only use the white part. Cut the white part in half lengthwise and thinly slice into long strips. Soak in iced water to make them crisp and curl.
- Heat the griddle or frying pan or outdoor grill and brush the oil on the griddle. When it’s hot, start cooking the meat. Once you get nice char on one side, flip and cook the other side. Cooking time varies depends on the meat and its thickness. Set aside.

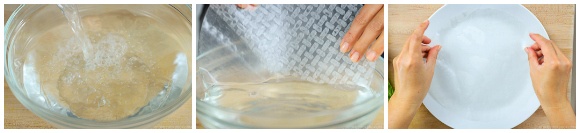
- Once all the food is prepared, pour hot water into a large bowl. Working with 1 wrapper at a time, soak the wrapper in the hot water and rotate 2-3 times, about 5 seconds. The wrapper will still feel slightly stiff but don’t worry, it will become softer. Place it flat on a plate.
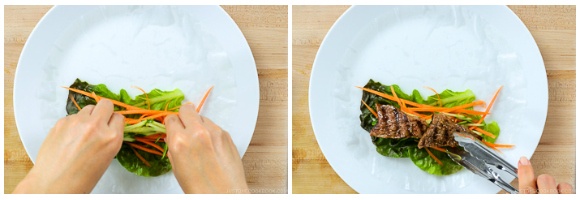
- Lay the lettuce, carrot, cucumber, white part of green onion, and grilled meat at bottom 1/3 of the rice paper.
- Pick up the bottom of the rice paper and press firmly down to hold the filling in place. Roll tightly once.
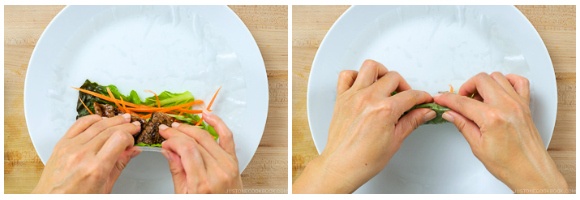
- Around the middle of the rice paper, fold both sides into the center and roll up tightly 1-2 times.
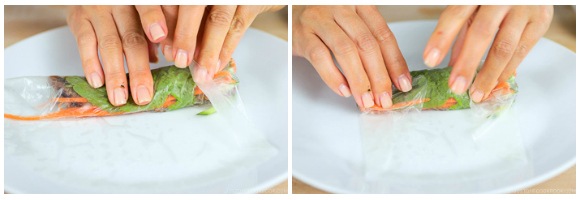
- Right before finish rolling, place the mint and cilantro leaves on the rice paper and finish rolling up. This way, you can see through the mint and cilantro. Set aside and cover loosely with plastic wrap. Repeat with the remaining rice papers and fillings.
- Cut in half or in thirds, and serve with the Yakiniku Sauce.
To Store
- If not serving immediately, keep the spring rolls tightly covered with plastic wrap at room temperature for up to 2 hours.


Hello Nami – I find your videos to be so professional, so well-planned and attractive. It is easy to understand the instructions and to follow along. Keep up the great work.
Hi Franklin! Thank you so much for your kind words. 🥰
Nami and all of us at JOC are thrilled to hear that you enjoyed Nami’s videos. Your support and love keep us motivated. Happy cooking! 🫶🏻
Hi Nami. Your recipes are so easy to follow and are delicious. My husband and I met and lived in Japan (Yamaguchi) for 3 years in the early 90’s. Your recipes provide a wonderful taste of nostalgia for us. I haven’t tried this recipe yet but will this weekend.
Hi Eleanor, We couldn’t be happier to hear how much joy and excitement Nami’s recipe has brought to you!
Thank you very much for trying Nami’s recipes and for your kind feedback. We hope you enjoy this dish this weekend!🙂
I have difficulty keeping my spring rolls from from sticking together after they are made. Any tips? Thank you for the best cooking blog.
Hi Shunji, Thank you very much for trying this recipe! Have you tried “Three Ladies Brand” rice paper? As Nami mentioned in this post, we found that this rice paper is easy to detach the rolls without tearing the rice papers when they stick to each other.
You can also try placing clean, dry linen and wrap the spring rolls to absorb excess water from the rice paper.
Another idea will be to wrap them with plastic wrap individually. We hope this is helpful.🙂
Hi! I want to try this fresh spring rolls with yakiniku recipe of yours. I have a few questions to ask.
•Could I make this in advance? A day before?
•Could I use any yakiniku sauce I could find in the grocery store?
Thank you in advance 🙂
Hi Sugar,
1) We do not recommend making this in advance. The wrapper will dry out the next day, and the texture of the fresh spring rolls will be different. If you have to make this in advance, I recommend you stop at step 9 and continue the rest of the steps the next day.
2) Sure, you can.
I hope this helps!
Thank you Naomi for your response. I really appreciate your advice! Will try this soon!
Hi Sugar,
My pleasure! I hope you enjoy this recipe!🙂
Loved how clearly everything has been explained and it was so refreshing, light and flavourful!!! I’m usually not someone to leave feedback, but this recipe prompted me to do so. Super easy to make for someone who doesn’t enter the kitchen too often and also for someone who comes from a background of Indian cooking. I’m now inspired to check out more recipes on this website.
Hi Shazia! Thank you so much for your kind feedback and I’m so happy to hear you enjoyed this dish! Thank you for trying this recipe and for your kind words.
turned out amazing! one thing though, the water does *not* need to be even to a simmer before going into the bowl to be hot enough to properly hydrate the rice papers. When I tried to use water that hot, the rice paper completely shriveled up immediately from how hot it was! I ended up dumping that water out and just using lukewarm water and that worked perfectly. Again though, great recipe!!
Hi Dan! Thank you so much for trying this recipe! I guess I’m used to making a lot and I use hot water to keep it warm throughout the wrapping process so I always use hot water. The key is to rotate the paper fast. I wrote 10 seconds but when I count 10 seconds I don’t think I soak that long. That’s too much. I’ll change to 5 seconds. Thank you for letting me know.
Good to know! Thank you for your reply!
Made this today with some kurobuta pork belly and it was out of this world! Perfect for a 90 degree summer day. Thanks for all the great recipes!
Hi Jenn! I am so happy to hear that you tried this recipe! Oh yes, Kurobuta pork belly…. I can imagine how delicious it was! Thank you so much for your kind feedback, Jenn!
Wow Nami this recipe looks so delicious and good , that I surely try to make it early as possible. I can’t resist my taste buds , but Nami can I tell me how to roll is rice paper I always break the rice paper sometime when I’m socking then in water and sometimes when I’m making the roll :D!!
When you soak the rice paper, don’t wait until the rice paper is soften. You rotate rice paper maybe twice or so and while it’s still in stiff shape, you transfer to the plate. It gradually soften while you’re placing fillings on it.
Now, for the rolling part. Maybe first mistake could be that you put too much filling? Maybe reduce the amount intentionally. Once you get hang of it, you can slowly increase the amount. And work quickly so that rice paper won’t stack on the plate. Make sure everything is all prepped so you just pick fillings, place, and start rolling.
Hope this helps a bit… 🙂
This is one of my favorite summer dishes! We usually serve it as a do it yourself party. Everyone gets to make their own rolls. Lots of fun, especially with unpracticed people:-))
Hi Lara! Oh yes, do-it-yourself makes it even less work and perfect for the summer time! Thank you for your great suggestions!!!